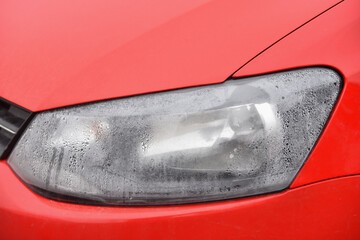
Over time, moisture can build up inside your headlights, causing them to become cloudy and dull. Not only is this unsightly, but it can also impact your ability to see while driving at night. In this blog post, we’ll show you how to remove moisture from your headlights so you can restore them to their original condition.
The first step is to ensure that your headlights are completely dry. If you’ve recently driven in the rain, this may require wiping them off with a dry cloth or paper towel. Once they’re dry, inspect the headlight for any chips or cracks that could be allowing moisture inside. If you find any damage, it’s best to replace your headlights before attempting to get rid of the moisture.
If there’s no visible damage, then it’s time to move on to drying out the headlight bulb itself. To do this, use a hairdryer and apply low heat over each section of the headlight until all of the moisture has been removed. Make sure that you keep the hairdryer moving so as not to cause any damage to the bulb.
After the headlight is dry, use a polish or sealant designed specifically for headlights to help restore their original clarity and protect them from future moisture build-up. Apply the product in small sections using circular motions and then let it sit until it’s completely dry before moving on to the next section. This will help ensure that your headlights stay clear for years to come.
By following these simple steps, you can easily remove moisture from your headlights and restore them to their former glory. Make sure you keep up with regular maintenance of your headlights so they don’t succumb to moisture build-up again in the future!
How To Remove Moisture From Headlight Using Compressed Air
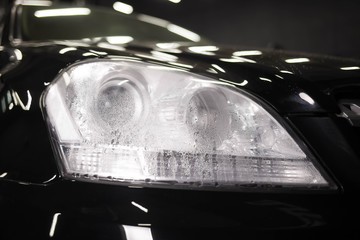
Moisture is one of the biggest enemies of headlights. Not only does it reduce the light output, but it can also cause corrosion and damage to the headlight assembly. If you’re having problems with moisture, here’s how to remove it using compressed air.
First, make sure that the headlight is off and cool to the touch. Then, use a compressor with an air hose and nozzle attachment to blow out any moisture inside the headlight assembly. Make sure you focus on getting all areas of the headlight housing, including corners and crevices. Keep blowing for several minutes until no more moisture comes out.
Next, remove any dirt or debris from around the headlight using a clean cloth or brush. This will ensure that there are no obstructions blocking airflow into the headlight when you try to dry it out later.
Now it’s time to dry out the headlight using compressed air again. Connect an air nozzle to your compressor and hold it about five inches away from the headlight. Blow out any remaining moisture for several minutes until the headlight is completely dry.
If you’re still having problems with moisture, consider purchasing an anti-fog coating to prevent it from forming in the future. This coating can be applied directly to the lens and will help keep your headlights free of fog and condensation for a long time.
Why Does My Headlight Have Moisture In It?
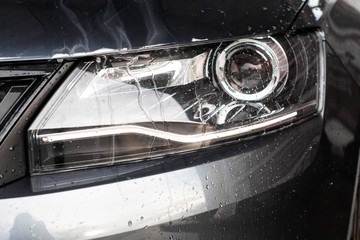
Moisture can form for a variety of reasons, including extreme weather conditions and improper storage. If moisture is not removed, it can cause the headlight to corrode and eventually fail.
Conclusion:
If your headlights have become foggy or cloudy, there are a few different ways you can remove moisture and restore them to their original condition. One way is to use a headlight restoration kit; another is to use a vinegar solution. Whichever method you choose, be sure to follow the directions carefully for the best results. Or, if you find any damage to your headlights, it’s important to replace them before attempting to get rid of the moisture. With these tips in mind, you can keep your headlights looking as good as new!
You May Also Like The Following: